Het wereldwijde magazine en verkoopplatform voor liefhebbers van klassieke auto’s, door liefhebbers.
Het wereldwijde magazine en verkoopplatform voor liefhebbers van klassieke auto’s, door liefhebbers.


Filter
Maak een keuze
- Auto's
-
Merk >>
-
Bouwjaar >>
-
-
Categorie >>
- Motorfietsen
- Onderdelen
-
Automerk >>
-
Fabrikant >>
-
Categorie >>
- Fietsen
-
Bouwjaar >>
-
Landen


PreWarWorkshop: Valve clearance issues


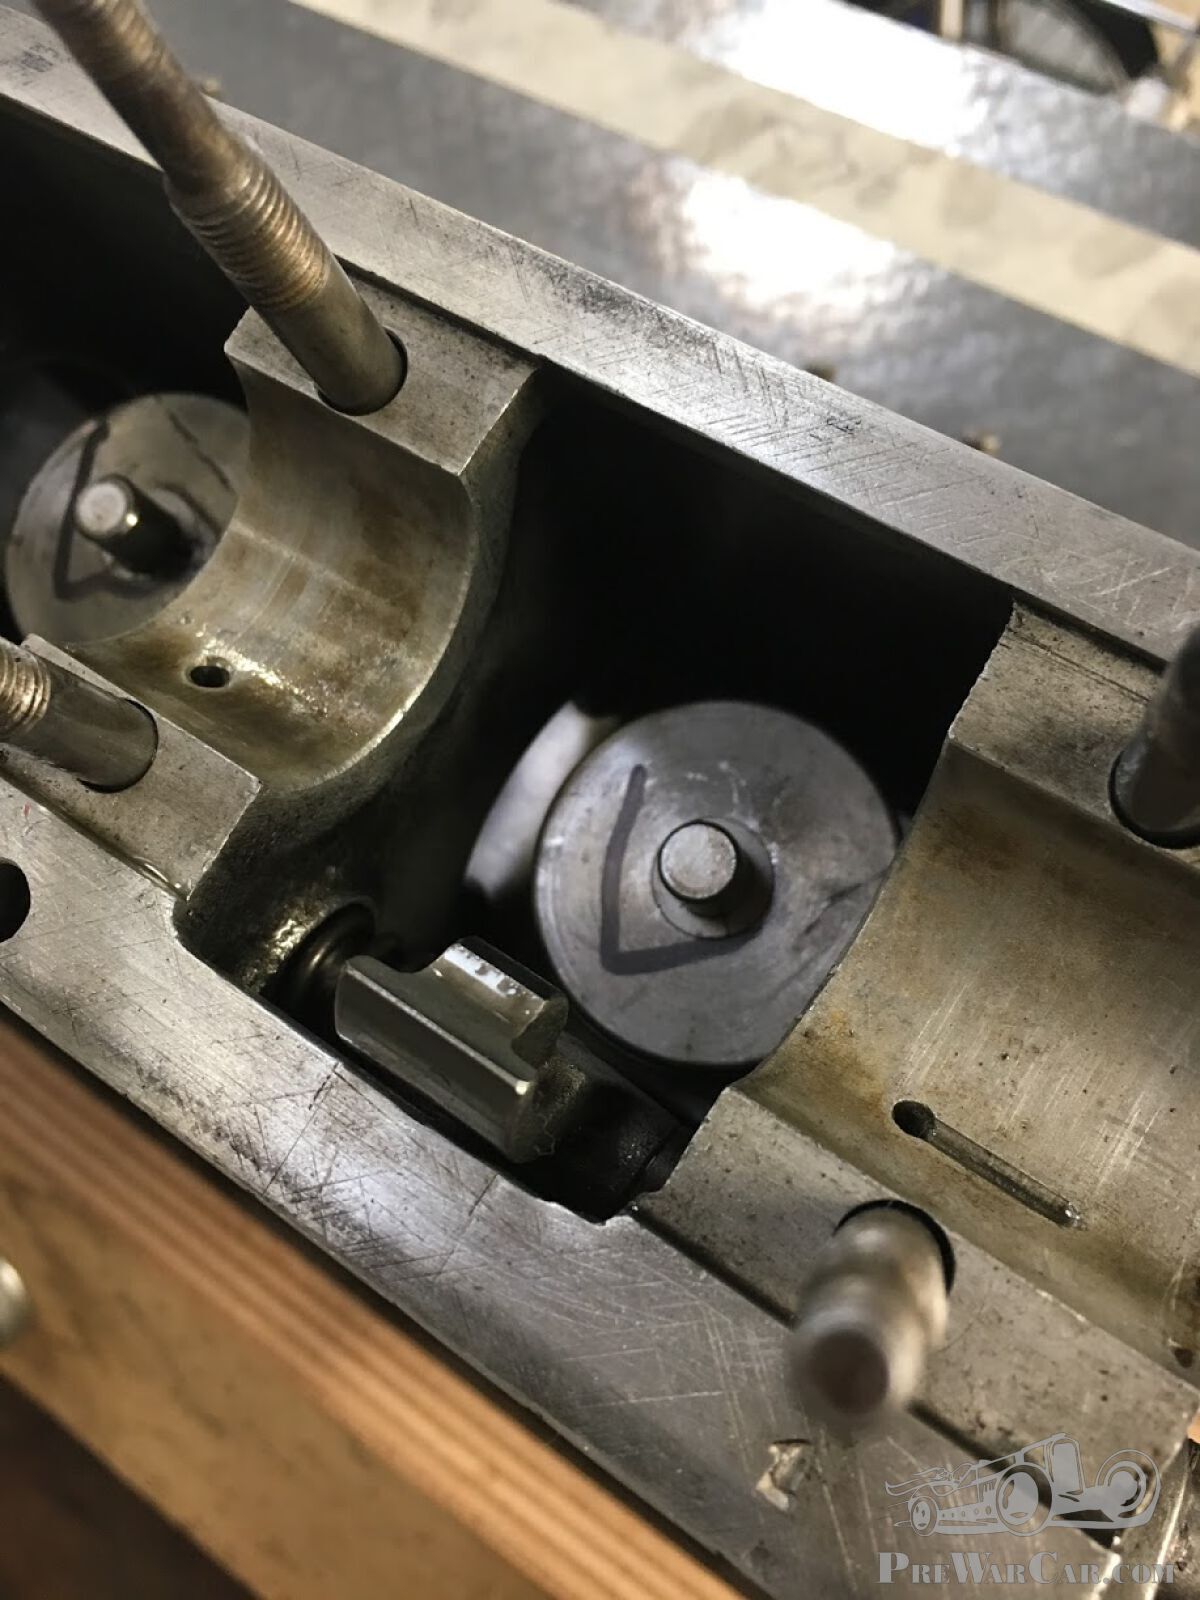


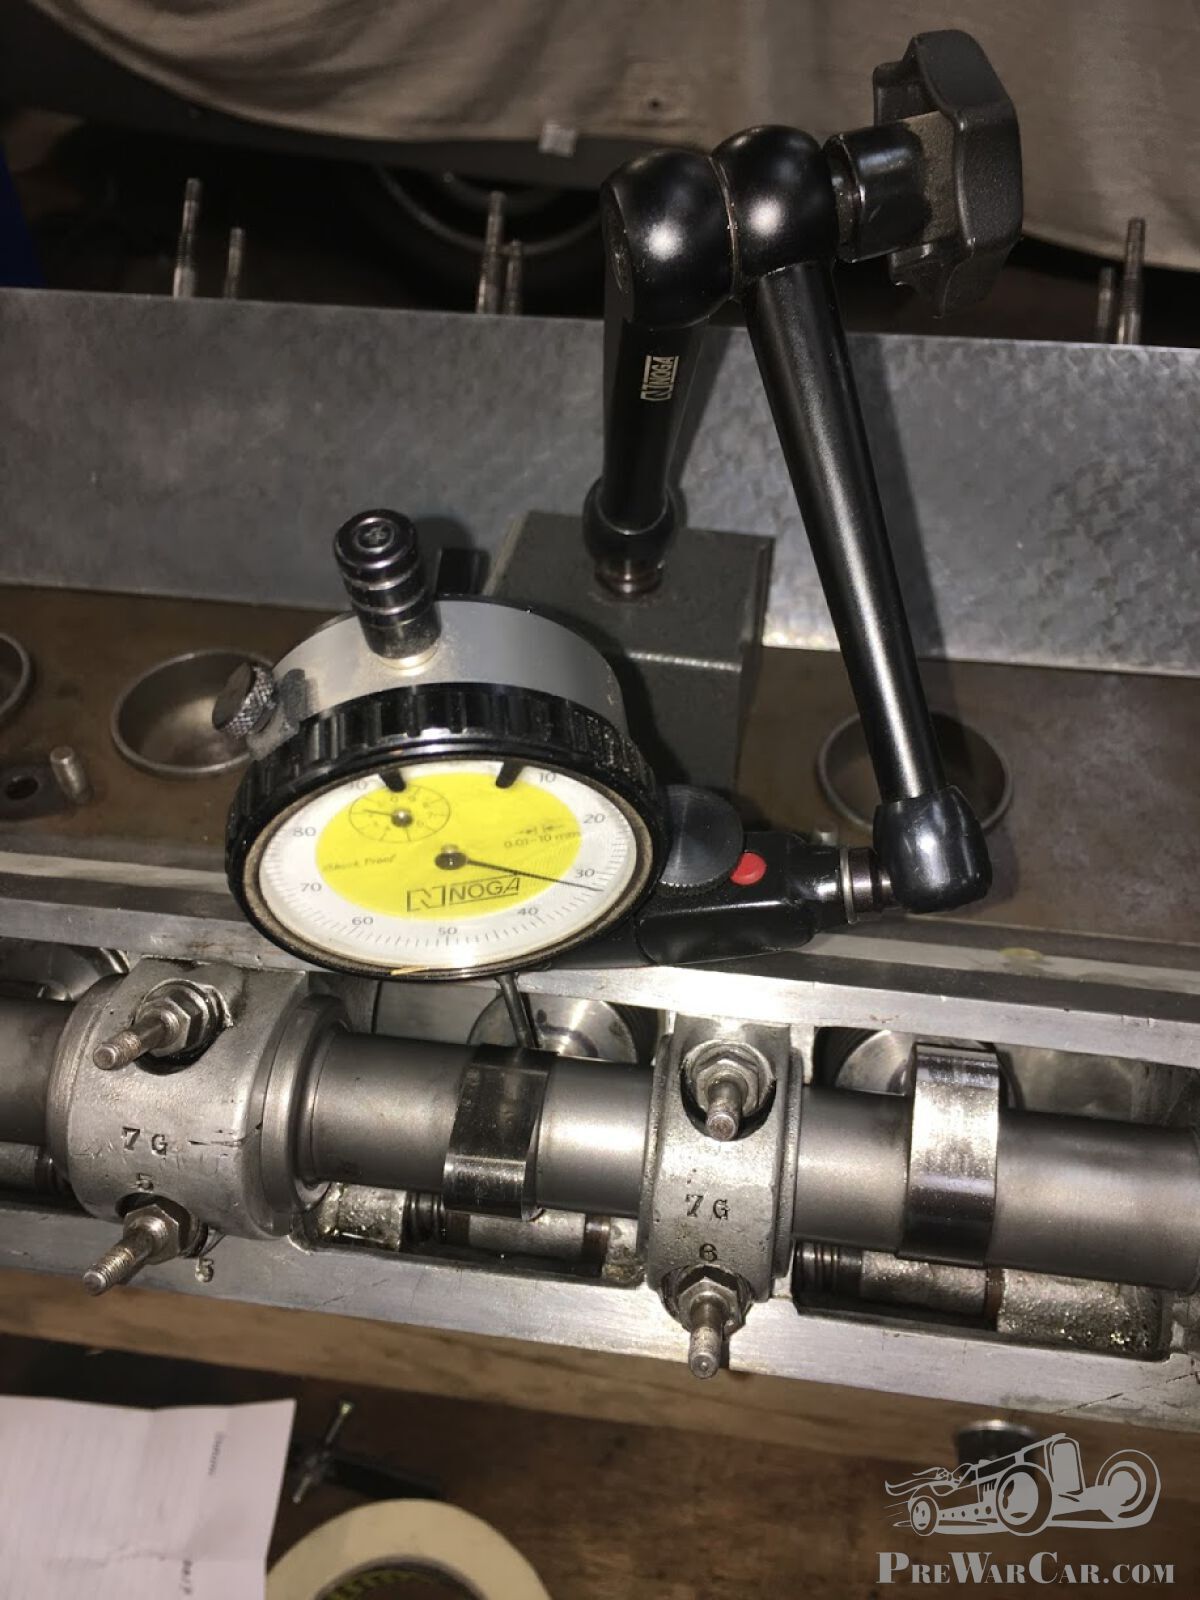

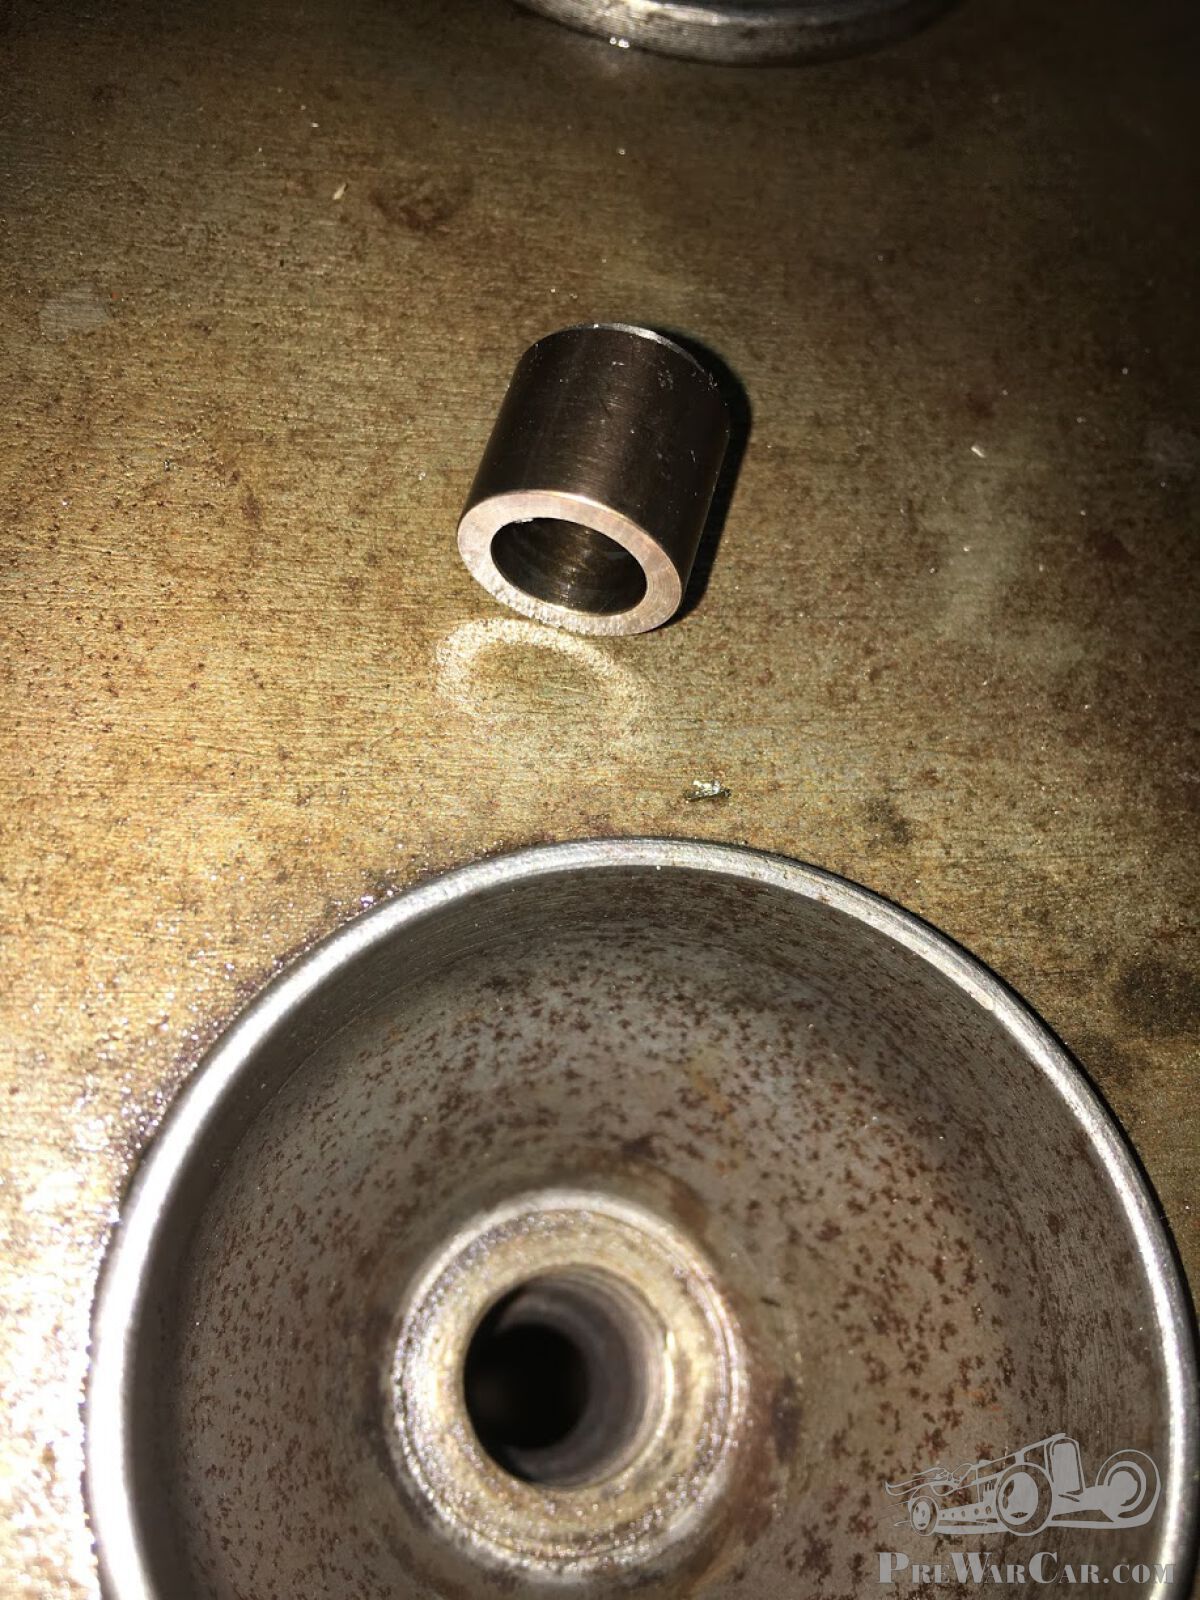
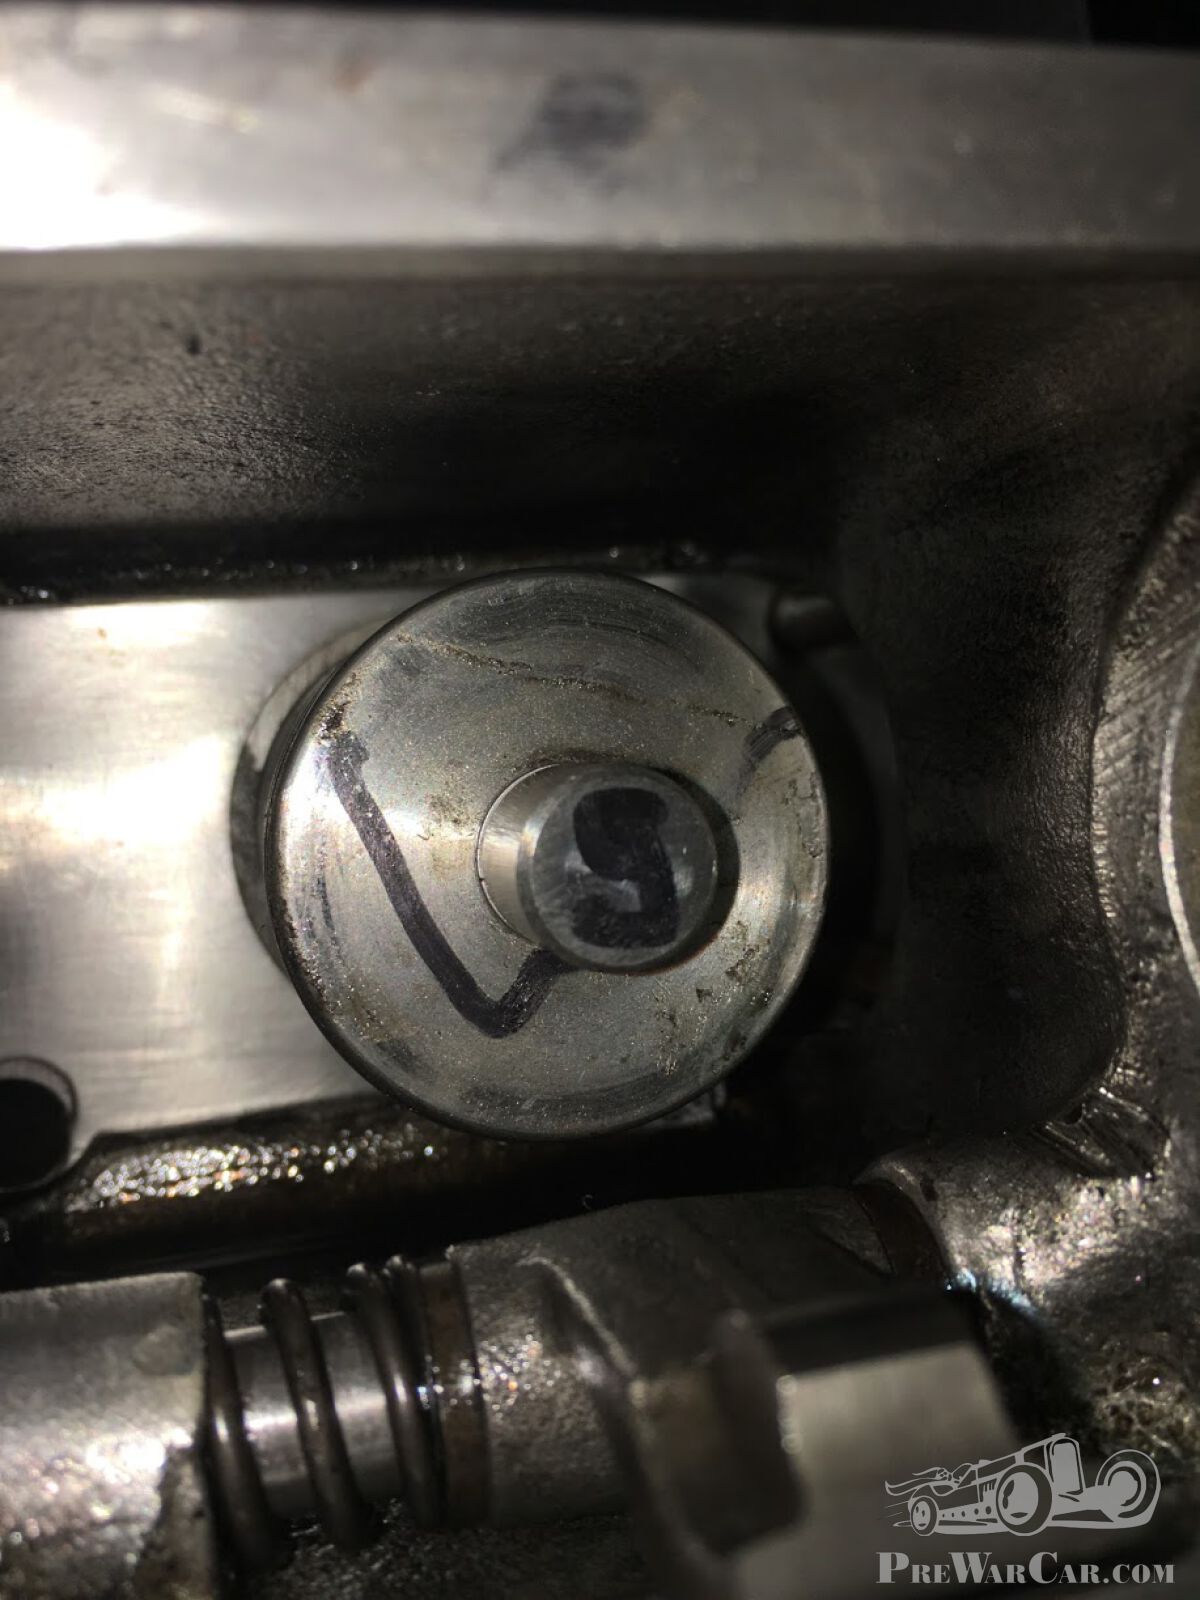


Throwback Thursday! A PreWarWorkshop: Valve clearance issues by Jos van Genugten.
Valve clearance issues
Lots of people have adjusted the valves on their beloved pre-wars on periodic maintenance. Which is a good practice to do regularly. It’s a precise job that, with very simple tools (wrenches, feeler gauges) can be done in the home shop as a part of regular maintenance.
In this article, I want to address a different system of adjusting the clearance than with the usual system of a threaded end of a rocker or cam followers. The system I am describing today is of a Bugatti Type 57 engine. But in this or different forms it is found on many other pre-war cars especially on veteran and brass-era engines.
The cam, valves etc are non-adjustable and use either shims, cups or some type of bushing to adjust the play. This means that parts have to be made or altered to adjust them. Accurate measurements are needed in this process to get it spot-on.
First, check the clearance when the whole assembly is still assembled. Do this with a dial-indicator if available. This is, because when the camshaft and followers have a little wear on them, it is possible that a feeler gauge rests on the unworn area and does not measure accurately (see here).
Then take the assembly apart, carefully marking the correct cap/shim or bushing with the correct valve. Then measure the thickness of each cap separately and write down what the correct thickness should be to get the correct clearance.
Then new caps should be made from hardened steel, ground to the correct dimensions. Please make sure you get the correct material. If it’s too soft, they will wear excessively. The PreWar Workshop can advise in this or get you the correct parts.
After this, everything can be mounted back in place and make sure to re-measure after it’s correctly fitted to make sure the clearances are OK!
A graphic explanation:
Picture 1: The complete camshaft assembly.
Picture 2: Measuring valve clearance with a dial indicator.
Picture 3: The valves without the cap to adjust stem length.
Picture 4: With the camshaft installed, there is very little room for measurement.
Picture 5: I turned a longer shaft for the dial indicator small enough to fit, as you can see there is very little room but it rests on the end of the cam follower. I have checked if there is a difference in measurement from the centre of the cam follower or the end, but in this case, it's about 0,002mm, which is neglectable since the play should be between 0,25 and 0,30mm. Always check this before measuring this way!
Picture 6: The complete setup.
Picture 7: One of the valve caps.
Picture 8: This cap slides over the stem.
Picture 9: The valve with the cap. I always mark these caps for dimensions not to get confused during installation.
Gepubliceerd:
donderdag april 16th, 2020
Facebook
LinkedIn
Twitter
WhatsApp
Email
Copy
Reacties
Thane Heal
18 April 2020, 19:20
It really is essential to remove all wear from all the components. The valve fingers need to share the same features in order for the clearance for the same travel to affect the valve. A worn surface is rarely smooth or consistent and accelerates the wear on the other parts i.e. the cam lobe and the lash cap. It may mean building up with weld and reshaping , or replacement. Bugatti valve fingers are not easy to remove , but with attention to each link in the chain you will achieve a consistent result. This practice works for clutch fingers as well , and stops the problem of a "moving target".
Lees verder
Fritz Christian
17 April 2020, 00:03
To Peter,
I guess that the dial indicator is resting on the top of the rocker finger that is located between the camshft and the valve cup.
The rocker finger must the be lifted against the camshaft either by introducing a tight fit feeler gauge between the valve cap and the rocker finger or by pulling it up against the camshaft manually with some kind of a hook i guess. This will lift the dial indicator rod with the finger indicating the valve clearance.
I would rather prefer the safe side with a minor excessive valve clearance than too tight.
Greetings,
Christian
Lees verder
I guess that the dial indicator is resting on the top of the rocker finger that is located between the camshft and the valve cup.
The rocker finger must the be lifted against the camshaft either by introducing a tight fit feeler gauge between the valve cap and the rocker finger or by pulling it up against the camshaft manually with some kind of a hook i guess. This will lift the dial indicator rod with the finger indicating the valve clearance.
I would rather prefer the safe side with a minor excessive valve clearance than too tight.
Greetings,
Christian
Thane Heal
16 April 2020, 21:11
It is my understanding that the camshaft ,finger ,and valve are not all the same hardness. Which component would be the softest , as a sacrificial part to minimize wear on more costly parts ?
Lees verder
Peter Irlenborn
16 April 2020, 21:06
Please: not so fast. You mention using a dial gauge to measure the original valve clearance, and I understand the concept of not wanting to use a feeler gauge because of the high and low possible points at the area of contact with the valve cap. BUT, does that mean you take two measurements at each valve and subtract to get the difference? If so, how do you get that second measurement? If that is not the case, please explain how you measure the gap with a dial gauge set to the top of the valve cap: please....OK? A person with 2 cars that have those variable height caps beneath the camshafts asks this question. (Bugatti 57C and Maserati Q-III, for a total of 6 camshafts).
Lees verder
Jos van Genugten
17 April 2020, 16:40
Hello sir, thank you for your interest. The dial gauge rests on the cam follower (the rocking “finger” between cam lobe and valve stem. The reason to do this is first the accuracy of it as you state, but second simply because a feeler gauge just doesn’t fit in the space you have. Nearly impossible.
With the indicator in place, you can manually lift the rocker up and down to measure clearance. It gives a reading on the dial. Substract the needed clearance and you get the amount of shim you need to add to the exisitng shim.
If there is no clearance at all,, take it apart and put in a much smaller shim to create more clearance and try again.
You do this multiple times before hitting your goal on all 8 valves of one cambox.
Lees verder
With the indicator in place, you can manually lift the rocker up and down to measure clearance. It gives a reading on the dial. Substract the needed clearance and you get the amount of shim you need to add to the exisitng shim.
If there is no clearance at all,, take it apart and put in a much smaller shim to create more clearance and try again.
You do this multiple times before hitting your goal on all 8 valves of one cambox.